Resonant is a fast and minimal portfolio WordPress theme built for digital agencies and studios. This theme will make sure that all your projects are presented in the best light.
Learn how you can get the most out of the theme with the Resonant WordPress theme documentation.
Resonant WordPress theme documentation, step 1: Theme specifications
- Logo recommended width is 220px.
- Portfolio featured image recommended width is 800px.
- Page and Post content maximum width is 740px.
Resonant WordPress theme documentation, step 2: Theme installation
The theme can be installed through the WordPress Admin panel.
- Log in the WordPress Admin panel.
- Go to Appearance -> Themes.
- Click on the Add New button, at the top of the screen.
- In Add Themes screen, click on Upload Theme.
- Click on Choose theme, and then browse for theme file on your computer.
- Click on Install Now to start the install process.
- After the installation is done, click on Activate theme.
A detailed video for theme installation is available here: https://help.themeskingdom.com/how-to-install-and-setup-the-theme.
After activating the theme, you will be prompted to install the required plugins. Required plugins in the Resonant WordPress theme documentation are:
Resonant WordPress theme documentation, step 3: Theme setup
To set up the theme, please follow the next steps:
- Create some posts – go to Posts -> Add New and create several posts. Be sure to set the featured image for each post, and you can organize your posts into categories.
- Go to Portfolio -> Project Types and first create several project types (categories) that will be used to organize your projects. After that, create new portfolio items. Set the title and featured image for each item, and assign an appropriate category.
- Head to Pages -> Add New and create pages – Projects, News, About, and Contact. For Projects page set Portfolio page template and insert content – in our demo, we have inserted text as heading and standard text. News, About, and Contact pages are using the default page template.
- On the About page, we have used text wrapped in paragraph element with “emphasis” class. Switch your block to HTML editor, and add class emphasis to the paragraph. Refer to the image to check how the code should look.
- On the Contact page, we will display contact information and a contact form. Add text block and insert your content. Add a form block, and Publish the page. Make sure to install and activate the Jetpack plugin, otherwise, Form block will not be available.
- Go to Settings -> Reading and set the theme to read static page. For homepage, set Projects page, and for posts landing page, set the News page.
- Time to set up navigation – go to Appearance -> Menus. Create a New menu, add all pages to it, and mark it as a Primary.
- Almost done – in Appearance -> Customize you need to set site identity and layout.
- In the Site Identity panel, either set the desired logo or enter Site Title and Tagline.
- Under Widgets add Navigation Menu widget to the sidebar, and select previously created Social menu to it. Add another widget – Text widget and insert the desired content into it.
- In Theme Settings -> Footer Settings Enter desired copyright text in the Footer Text field.
- In Theme Settings -> Header Settings enable sticky header.
- In Theme Settings -> Layout Settings set portfolio page to display Three columns, enable portfolio title, show portfolio filter, and turn on a split layout in portfolio posts.
Here are some other ways you can customize the theme and add a personal touch to it:
Resonant WordPress theme documentation, step 4: The Customizer
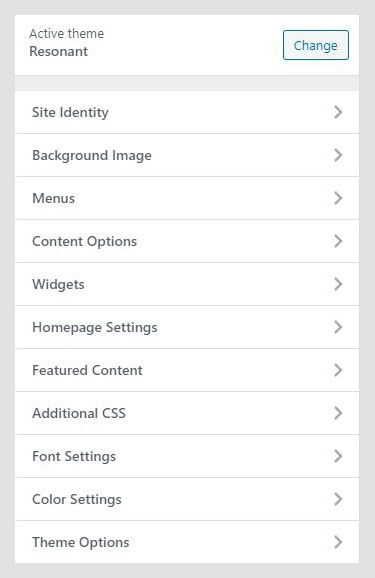
The Customizer in the Resonant WordPress theme documentation is a great WordPress feature that allows you to customize the theme and set theme options. We will not explain all options since some of them are WordPress standard. Theme specific settings:
- Site Identity
- Background Image
- Menus
- Content Options
- Widgets
- Homepage Settings
- Featured Content
- Additional CSS
- Font Settings
- Color Settings
- Theme Settings
Site Identity
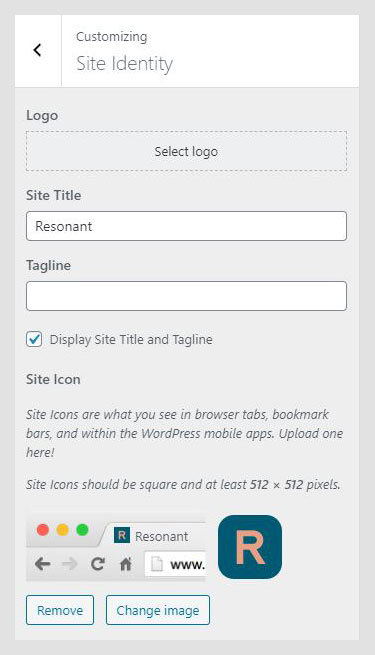
Site Identity allows you to set your site title, tagline, and icon. The Site Title is the name of your site and it’s displayed in the header, where the logo is displayed. A Tagline is a short description or your motto, and it’s displayed just under the title. This setting is the same as in Settings -> General in WordPress admin panel.
- Logo: Upload logo for your site. The logo should be in a PNG or JPEG/JPG format.
- Site Title: Name of your site.
- Tagline: Site punchline.
- Display Site Title and Tagline: If enabled, both site title and tagline will be displayed. The Tagline will be displayed under the title.
- Site Icon: The Site Icon is used as a browser and app icon for your site. Icons must be square, and at least 512px wide and tall.
Background Image
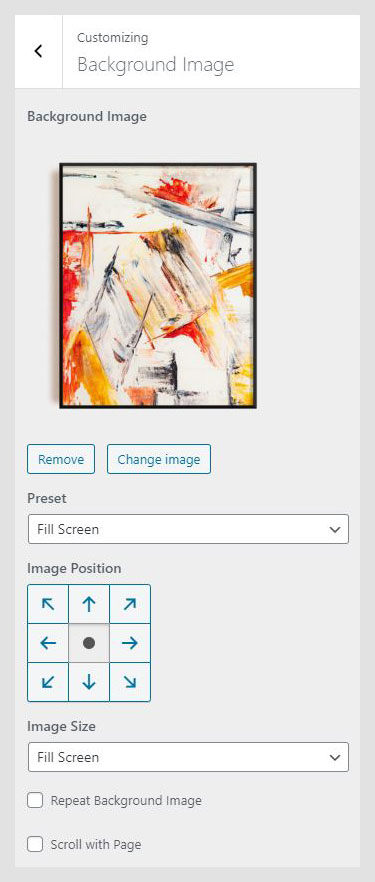
Depending on the use case, some users need to set a background image on the site. In the Background Image panel, you can set a background image. After choosing an image, you will be able to set the background behavior.
- Preset: Defines image size – Fill Screen will stretch the image to fill the whole site; Fit to the screen will cover the only visible part of the site, and Repeat will keep original image proportions, but it will repeat the image. Custom allows you to manually set background parameters.
- Image Positions: Tool used to define the starting position for the image.
- Scroll with Page: This option is available only if the background image is set to Repeat. If checked, the background will scroll together with the page content.
Menus
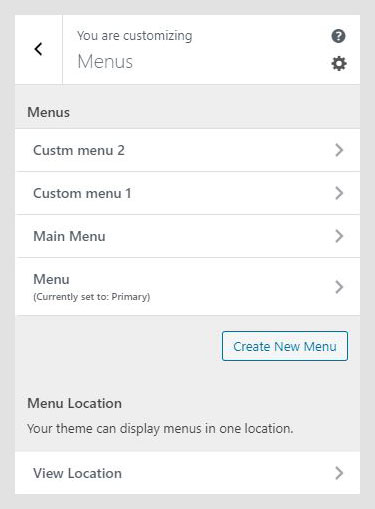
The Customizer menu option in the Resonant WordPress theme documentation allows the user to manage available menu locations, and add and remove menu items.
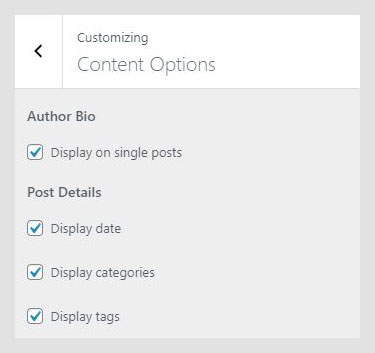
Content Options
The Content Options panel contains settings for metadata for single posts – both regular and portfolio.
- Author Bio: If enabled, the author bio box will be displayed on the single post page.
- Display date: If enabled, the publishing date will be displayed on a single and posts page.
- Display categories: If enabled, post categories will be displayed on a single and posts page.
- Display tags: If enabled, post tags will be displayed on a single and posts page.
Widgets
Widgets are useful extensions for content, which you can add to your sidebar or other widget areas. In the Widgets option in the Customizer, you can see available widgets area in the currently active theme.
Homepage Settings
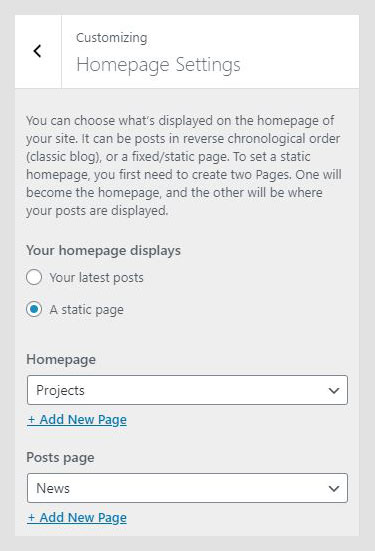
Homepage Settings in the Resonant WordPress theme documentation work the same way Reading settings in Settings -> Reading do. Homepage Settings also allow you to set the theme to use static homepage, or to display the latest posts.
Featured Content

Featured Content is displayed as a screen covering slider on the landing page. Five latest posts with the entered tag will be displayed as featured content.
- Tag name: Enter the tag related to posts which you wish to display in the slider.
- Display featured posts: Featured posts can be displayed as a film strip, larger image, or as a full-screen slider.
In our demo: http://resonant-photographer.tkdemos.com, we have set a page with a default page template as a landing page. That way no other content is displayed, but only the slider. If you set a static page with a Portfolio template, then portfolio items will be displayed under the slider. - Do not display tag in post details and tag clouds. If enabled, the featured content tag will not appear in post meta and/or tag cloud.
- Also, display tagged posts outside the Featured Content area: If enabled content displayed in the slider will be displayed on archive pages as well.
Setting up a slider
To set up the slider:
- Go to Settings -> Reading. Select the homepage to display Your latest posts.
- Go to Posts -> Add New. Create several posts. For each post, enter the title, and set featured images. Tag desired posts with the same tag e.g. Featured. The tag will be used to identify and display desired posts as a slider.
- Finally, go to Appearance -> Customize, and under Home Slider Options -> Slider – Featured Content enter the tag used for the posts.
Resonant WordPress theme documentation, step 5: Additional CSS
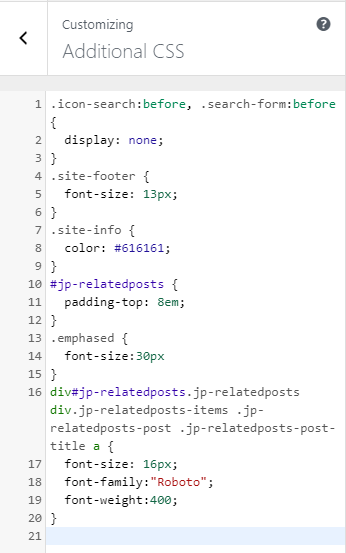
In the Additional CSS section of the Resonant WordPress theme documentation you can enter your custom CSS classes, so you don’t need to mess with original styles, or create a child theme. Of course, you should create a child theme if you plan to modify other files as well.
Font Settings
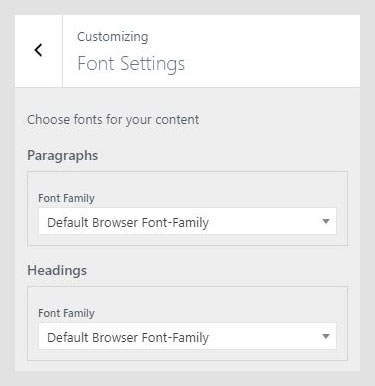
Font settings allow you to set the font-family and font-weight for headings and paragraphs.
Color Settings
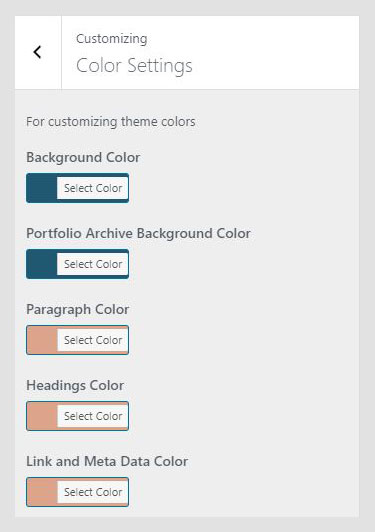
The Colors panel allows you to set header text and background colors.
Theme Settings
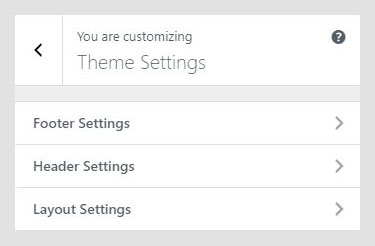
The Theme Settings panel in the Resonant WordPress theme documentation contains theme-specific settings.
Footer Settings

The Footer Settings panel is used to set footer copyright text. You can insert HTML if you need to create links, bold text and such.
Header Settings
The Sticky header option can change the behavior of the site navigation. If the sticky header is enabled, it will always be visible at the top of the screen.
If disabled, the header will scroll together with the page.
Layout Settings
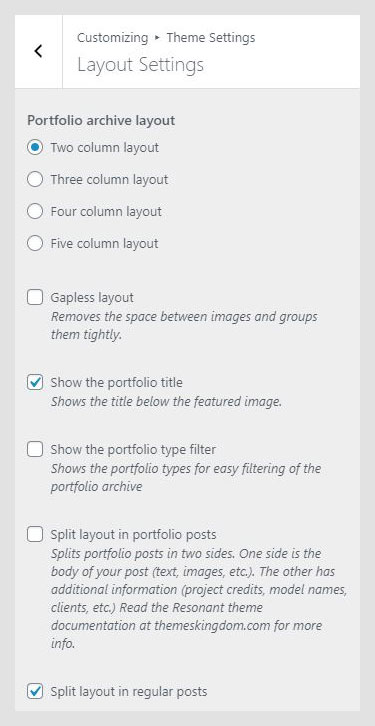
Layout Settings in the Resonant WordPress theme documentation have options for setting the number of columns and portfolio and single post appearance.
- Portfolio archive layout: Portfolio archive can display portfolio items in two, three, four, or five columns.
- Gapless layout: If enabled, images on the Portfolio page will be displayed without the gap between them.
- Show the portfolio title: If enabled, the portfolio title will be displayed under portfolio items on the Portfolio page.
Otherwise, the portfolio item title will be displayed on a mouse hover over a single portfolio item. - Show the portfolio type filter: If enabled, portfolio categories will be displayed above portfolio items as a filter.
- Split layout in portfolio posts: Splits portfolio posts on two sides. One side is the body of your post (text, images, etc.). The other has additional information (project credits, model names, clients, etc.)
- Split layout in regular posts: If enabled, the post will be split into two sections – one side with a featured image and the other with the post content.
Resonant WordPress theme documentation, step 6: Useful CSS classes
Modify site title font size
.site-branding .site-title a {
font-size: 16px;
}
Modify navigation font size
.nav-menu li a {
font-size: 20px;
}
Remove strikethrough line
.nav-menu a:before {
display: none;
}
Hide search
.big-search-trigger {
display: none;
}
Change highlight background and text color
.highlighted-text {
color: #fff;
background-color: #000;
}
Change page title size
.page-header .page-title {
font-size: 42px;
}