Idento is a bold and feisty personal WordPress theme made for creatives that wish to build their online presence. This theme is the epitome of striking design and stunning typography.
Learn how you can get the most out of the theme with the Idento WordPress theme documentation.
Idento WordPress theme documentation, step 1: Theme specifications
- Recommended logo size is 210 x 40px.
- Post featured image recommended width is 830px.
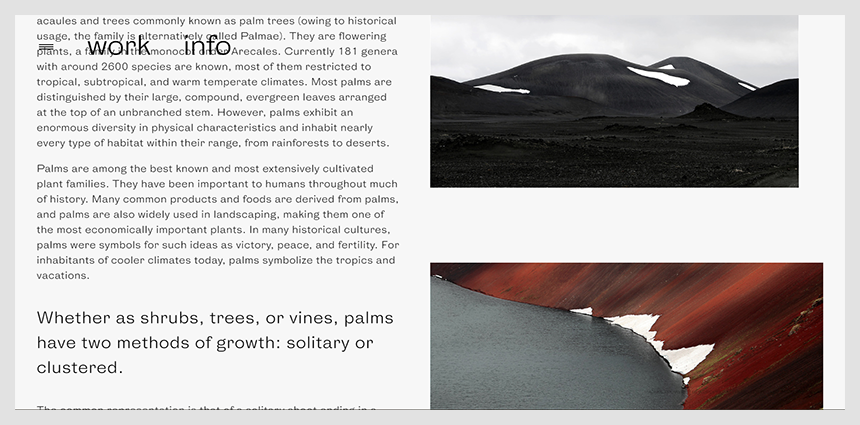
- Post content maximum width is 830px.
- Portfolio image recommended size is 1920x1080px.
Idento WordPress theme documentation, step 2: Theme installation
The theme can be installed through the WordPress Admin panel.
- Log in to the WordPress Admin panel.
- Go to Appearance -> Themes.
- Click on the Add New button, at the top of the screen.
- In Add Themes screen, click on Upload Theme.
- Click on Choose theme, and then browse for theme file on your computer.
- Click on Install Now to start the install process.
- After the installation is done, click on Activate theme.
A detailed video for theme installation is available here: https://help.themeskingdom.com/how-to-install-and-setup-the-theme.
After activating the theme, you will be prompted to install the required plugins. Required plugins in the Idento WordPress theme documentation are:
Idento WordPress theme documentation, step 3: Theme setup
Idento theme is a great choice for people who have already have established their names and brand and need a theme that can promote their names and work without too much hassle.
To set up the theme, please follow the next steps:
- First, go to Pages -> Add New, and create two pages – Bio and Contact. Both pages are using the default page template.
- On the Bio page, insert your biography (we have used h1 tag) and insert a link to the contact page. In our demo, the sentence Get in touch is a link to the Contact page. Be sure to set the featured image.
- Insert a contact form from Jetpack into the Contact page.
- Go to Settings -> Reading. Select the homepage to display a static page. For the Homepage, set the Bio page, and leave the Posts page blank.
- Creating Primary and Social menu: Go to Appearance -> Menus. Create a new menu with title e.g. Primary. Add all your pages to it, and mark it as a Primary.
- Finally, add some personal touch to the theme. Go to Appearance -> Customize.
- Site Identity: Set your logo or enter a site title.
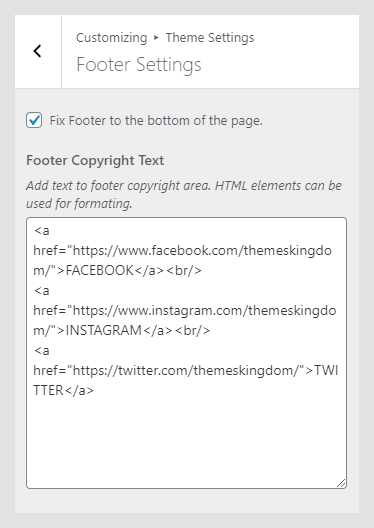 Under Theme Options -> Footer Settings enter links to your social profiles using HTML tags. Check the option “Fix Footer to the bottom of the page.”
If you want to customize the theme a bit more, be sure to follow these steps:
Idento WordPress theme documentation, step 4: The Customizer
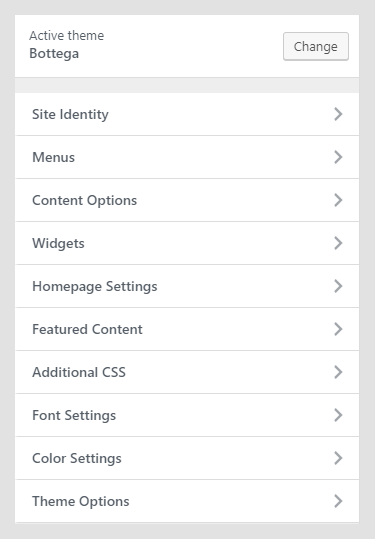
The Customizer in the Idento WordPress theme documentation allows you to modify theme visuals and settings easily. Here are the customization options in the Idento theme:
- Site Identity
- Menus
- Content Options
- Widgets
- Homepage Settings
- Featured Content
- Additional CSS
- Font Settings
- Color Settings
- Theme Options
Site Identity
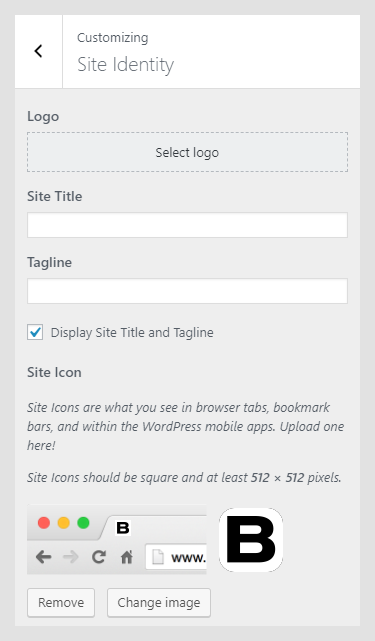
Site Identity panel is used for setting up basic site identity:
- Logo: Site logo is an image in a .jpg, .jpeg, or .png format. Suggested logo image size is 210 x 40px.
- Site Title: The name of your site. Ideal length should not exceed 20 characters. If the Site Title is longer, it will be displayed in two (or more) lines.
- Tagline: Tagline is a short description of the site, or simply a punchline of your business.
- Title and Tagline Visibility: If Display Site Title and Tagline is checked, both Site Title and Tagline will be displayed.
- Site Icon: Site Icon will be displayed in a browser tab, bookmarks or in the WordPress mobile app. The icon should be squarely-shaped, and the recommended icon size is 512 x 512px.
Menus

The Customizer menu option allows the user to manage available menu locations, and add and remove menu items. The Idento theme has two menu locations available – the Header menu, which is mostly used as a Primary menu, and the Social menu. Menus can be managed from Appearance -> Menus, as well.
Content Options
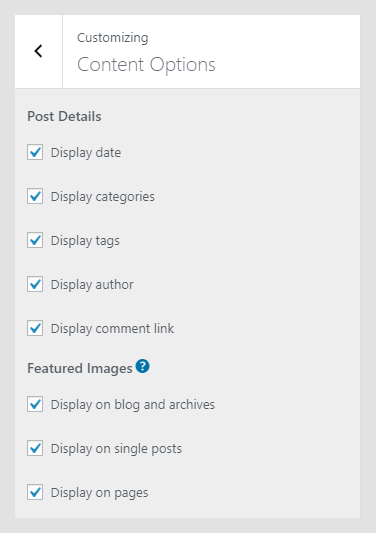
The Content Options panel in the Idento WordPress theme documentation allows you to control the visibility of posts metadata. By enabling or disabling the options you can show or hide dates, categories, tags, and the author for all posts. Besides that, you can control where the featured image will appear. Featured image for posts and portfolios can be enabled or disabled on archives, blog pages, single posts. That way, you can set a featured image to be visible on posts page, but hidden on the single post page.
Widgets
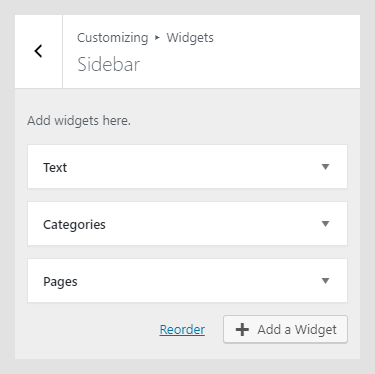
Widgets are useful extensions for content, which you can add to your sidebar or other widget areas. In the Widgets option in the Customizer, you can see available widgets area in the currently active theme.
Idento theme has the top widget area, which is triggered by clicking on the button.
Homepage Settings
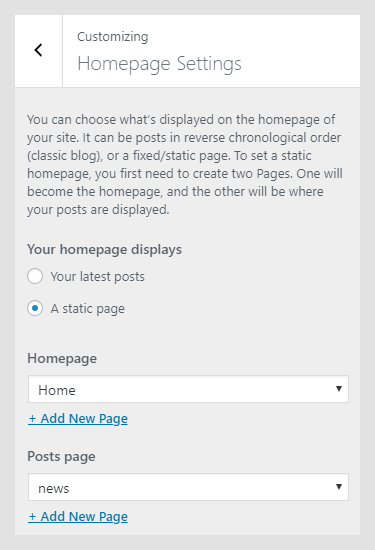
Homepage Settings in the Idento WordPress theme documentation work the same way Reading settings in Settings -> Reading do. Homepage Settings allow you to set the theme to use static homepage, or to display the latest posts.
Featured Content
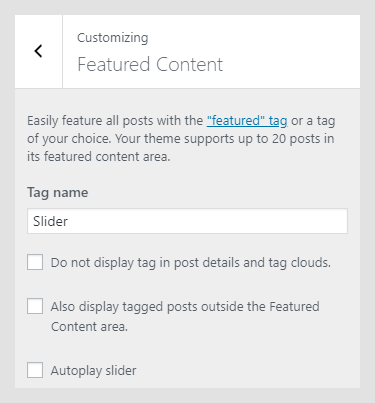
Featured Content can set the tag that is used for the projects to display them as the slider on the homepage. The Slider can display up to 20 slides.
- Tag name: Enter the tag name that you have used for portfolio items that you wish to appear on the homepage.
- Do not display tag in post details and tag clouds: If enabled, the tag used for the slider will not be displayed anywhere.
- Also, display tagged posts outside the Featured Content area: If enabled, portfolio items tagged with the tag used for the slider will be displayed on the page with portfolio template, as well.
- Autoplay slider: If enabled, the slider will automatically play slides.
- Show slide numeration: If enabled, the slide number will be displayed on the side.
Setting up a slider
To set up the slider:
- In Pages -> Add New create a new page with title e.g. Home, and for the page template, select the Default template.
- Go to Settings -> Reading. Select the homepage to display a static page. For the Homepage, set the previously created page.
- Go to Portfolio -> Add New. Create several portfolio items. For each portfolio item enter the title, and set featured image. Tag desired portfolio items with the same tag e.g. Featured. The Tag will be used to identify and display desired portfolio items as a slider.
- Finally, go to Appearance -> Customize, and under Home Slider Options -> Slider – Featured Content enter the tag used for the portfolio items.
Additional CSS
The Additional CSS section in the Idento WordPress theme documentation is used for custom CSS classes, without interfering with theme original CSS files, or creating a child theme. These classes are always loaded first, before other stylesheets. In the Useful CSS Classes section, you can find some most used classes.
Theme Options
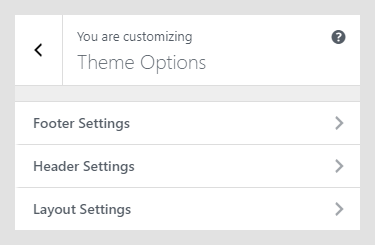
Theme Options panel contains theme-specific settings.
- Footer Settings
- Header Settings
- Layout Settings
Footer Settings
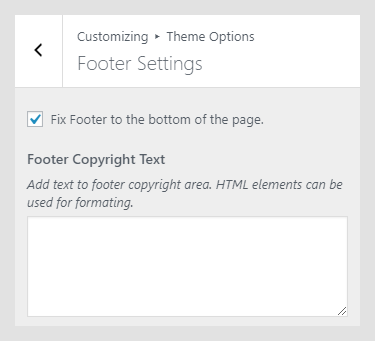 Footer Copyright Text: The text that will be displayed in the footer, as footer credits. You can enter basic HTML elements to create links and stylize footer text.
Header Settings
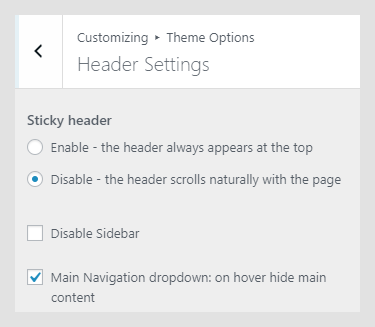
In Header Settings of the Idento WordPress theme documentation, you can set theme header behavior. Here you can enable or disable sticky header, and disable sidebar(widgets area) trigger. Main Navigation dropdown: on hover hide main content option is used to display portfolio featured image over the whole site when hovering over the menu item.
Layout Settings
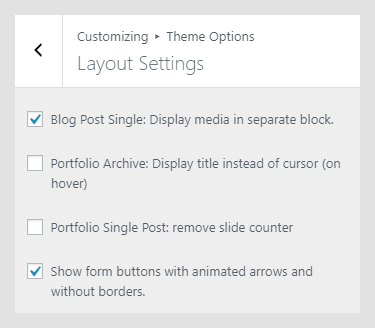
Layout Settings are used to define layout on the single post page and on the archive pages.
-
- Blog Post Single: Display media in a separate block will extract all media files (images and videos) from your single post, and on the single post text will be displayed in the left column, while media will be displayed in the right, scrollable, column.
Images in a single media block. - Portfolio Archive: Display the title instead of the cursor (on hover): The project title can be displayed on the portfolio image instead of the cursor, and it will follow the mouse pointer movement inside the Portfolio image.
- Portfolio Single Post: Remove slide counter: If you have more images in your portfolio item, the number of images will be hidden.
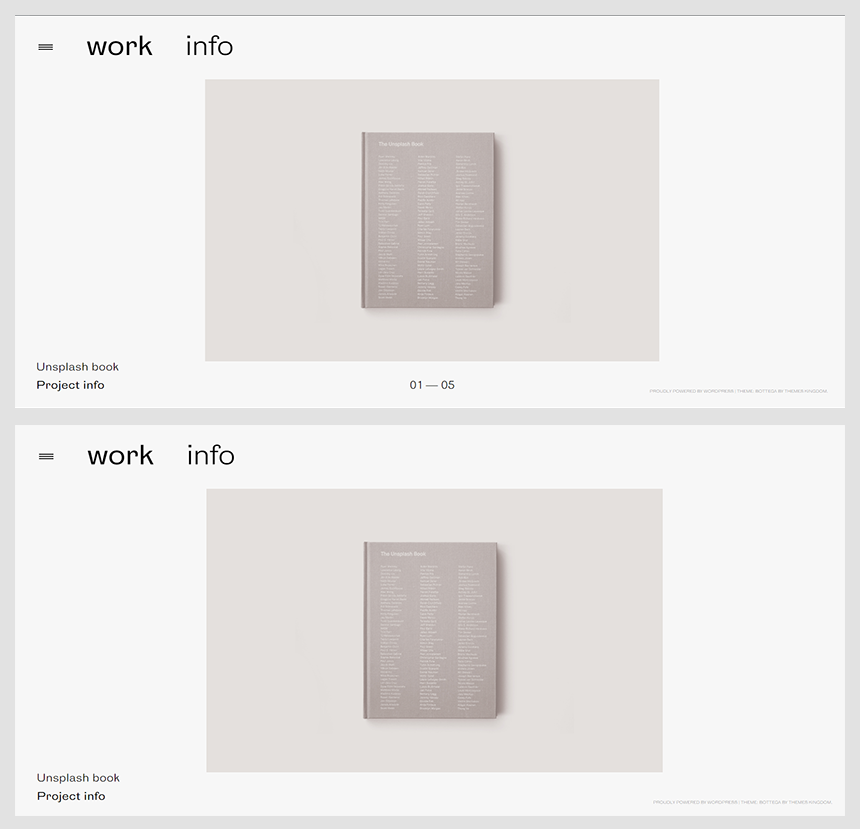
Single portfolio slider numbers turned on and off. - Show form buttons with animated arrows and without borders: This setting applies only to the Jetpack form. If checked, the Submit button will be displayed as an animated arrow.
- Blog Post Single: Display media in a separate block will extract all media files (images and videos) from your single post, and on the single post text will be displayed in the left column, while media will be displayed in the right, scrollable, column.
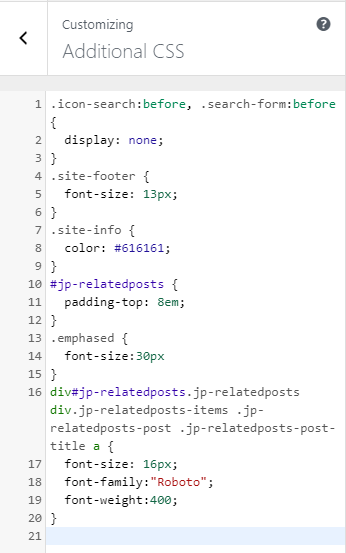
Idento WordPress theme documentation, step 5: Useful CSS classes
Custom CSS classes can be added to the Additional CSS section in the Customizer.
Making an image show on hover over the word
In our demo, on the About page, the artist’s image will pop-up when you hover over their name. To create that effect, insert an HTML block, and add code like this:
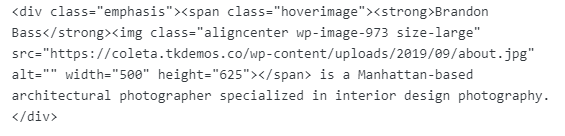
So, it’s important to wrap the desired word and image into the element with the class “hoverimage”. That way, the word will become show trigger for that image.
Remove the main menu stroke on hover – replace #000 with the desired color hex value.
@media only screen and (min-width: 1025px) {
.site-header nav a:hover, .site-header nav a:focus {
    -moz-text-fill-color: #000;
    -webkit-text-fill-color: #000;
    -moz-text-stroke-color: transparent;
    -webkit-text-stroke-color: transparent;
    -moz-text-stroke-width: 0;
    -webkit-text-stroke-width: 0;
}
}
Change single post title size
.single-post header h1.entry-title {
font-size: 48px;
}
Change single post content text size
.single-post .entry-content p {
font-size: 14px;
}